Preface
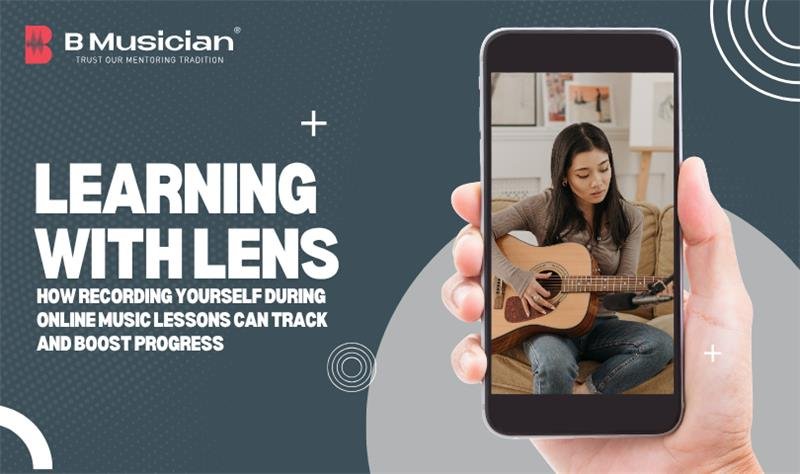
Studying music via online music lessons is great. You get to be in your own space and learn at your own pace. But it also means you can’t always rely on your teacher to catch every mistake you make during the lesson. That’s where you can play director: hit the record button on your phone or computer and become both performer and audience. Recording music lessons or practice sessions gives you an honest replay of what you actually sound (and look) like. It’s one of the best ways to hear things you normally miss while playing live. In fact, self-recording is like getting a second pair of ears and eyes to guide your practice. By listening (and watching) yourself, you can pinpoint timing hiccups, off-notes, or posture issues that only show up in a recording and that can seriously speed up your improvement.
Recording isn’t just for professionals: all types of musicians whether you’re strumming guitar chords, tickling piano keys, pounding drums, or singing your heart out benefit from this trick. When you review your own performance, you see how your playing truly comes across. As one musician says, “When you’re behind your instrument you can’t fully hear what’s happening. But as soon as you turn on a recording, guess what? The mistakes become clear”. By using the lens of a camera and the clarity of a playback, you align what you think you’re doing with what’s actually happening. The result? Faster progress and more confidence in your music.
Honest Feedback: Hear What You Really Sound Like
When you’re in the thick of an online lesson or deep in practice, you might feel like it sounds great but are you sure? Our brains often fool us into thinking everything is perfect while we play.
Recording yourself removes that guesswork. It gives you unfiltered feedback from an external perspective. When you listen back, you’ll hear exactly which notes waver, which rhythms rush, or which lines could use more expression. It’s like having your teacher whisper in your ear (but better as it will be you monitoring and whispering to yourself).
Think about it: professional athletes and public speakers watch game tape or video of their talks to improve. Musicians should do the same. Self-recording prevents that “distorted perception” of our own sound. For example, guitarists often discover their tempo speeds up without them realising it, or vocalists find a pitch drop they only hear on playback. In one study-like context, a singer might record a song and be shocked to hear a flat note that they never noticed while singing. That revelation pushes you to course correct before a bad practice/technique becomes a habit. In short, playing back your own sessions reveals your weak spots so you can target them.
Hearing imperfection isn’t necessarily a bad thing. It’s actually super motivating. You can see and hear exactly what to work on, which is way more efficient than guessing. Recording lets you pause, rewind, and take notes on critical tips you learned. It’s like giving yourself an assistant!
Tools to Capture Your Lesson: Technology at Your Fingertips
The good news is that you do not need the state of the art technology to get started. Most of us carry a powerful recording studio in our pockets. Smartphones are perfect for this. All modern phones have decent cameras and mic inputs. On an iPhone or Android, just open the camera or voice memo app and hit record. (On iPhone, you can even change the audio to lossless quality in Settings for crisper sound) If your phone seems to cut off some frequencies, that’s normal smartphone mics are limited but it’s still amazing for daily use. You can also grab an inexpensive clip-on mic if you want to upgrade later, but it’s not necessary at first.
Laptops and tablets also work wonderfully. The microphone and camera in the gadgets can capture video easily just launch your camera app or a simple recording app. For instance, Mac users can open QuickTime and hit “New Movie Recording,” while Windows users can use the Camera app or even the free Voice Recorder for audio. There are also free programs for audio and video, if you ever want more control. But really, you can start with the basics: a simple video file from your Zoom lesson or a quick phone recording of a practice run.
Many video chat platforms even have a built-in record button. For example, Zoom as a platform lets the host (often the teacher) record the session, and then you can get the file afterward. Google Meet and Skype have similar options. Always ask your teacher first, but most are happy to let you replay the lesson later. It’s helpful for you!
Here’s a quick tool checklist:
- Phone camera or audio recorder: Easy and portable. Great for a quick practice take or recording yourself playing along with the lesson. (Suggestion: make sure to set your phone on an even surface or an appropriate tripod so you can see both your hands!)
- Computer (camera/mic): Use your laptop’s webcam/mic. You can open a blank Zoom meeting by yourself and record, or use QuickTime/Voice Recorder (no need to call anyone). The file will be saved for review.
- Video chat recording: During your online lesson, hit “record” if available. Later you’ll have a full playback of your entire lesson to review from again.
- Bonus apps: There are free music apps that can also record your playing with decent quality. They’re overkill for simple lessons, but fun if you already use them.
Using Your Recordings: Step-by-Step for Progress
Once you have a recording, what next? The key is to make listening back a regular habit. Here’s how to use those clips effectively:
- Set a clear goal before you hit record. Decide what you’re focusing on. Maybe you want to nail a tricky guitar riff without timing slip-ups, or keep a steady beat on the drums, or hit every note of a challenging melody. Knowing your goal will help you listen for specific issues. For example, if rhythm is your focus, play a bit and later listen just to see if the tempo wavered. This is an effective way to not feel overwhelmed by multiple factors at once.
- Start short and simple. It can be intimidating to review a 30-minute lesson, so begin with small chunks. Play just the first verse of a song, or a 10-second scale, or an easy riff. Record it. This makes it easy to pinpoint errors and keeps the review quick. Over time you can tackle longer clips.
- Listen and take notes. Find a quiet moment with your recording. Put on headphones and be objective. Pretend you’re a teacher grading a student. What jumps out? Maybe the guitar improvisations have lost direction or tonal clarity or your singing occasionally hits an off key, here and there. Write down the timestamps and problems (for example: 0:23 – rushed B chord change, 1:10 – throat tenseness affecting voice). Focusing on one issue at a time makes it less frustrating.
- Compare past and present. Keep all your recordings organised by date. Every few weeks, play an old clip and then a new one of the same piece. You’ll be amazed at how much you’ve improved, sometimes without even realising it. Hearing clear progress is a huge motivator. It shows your hard work is paying off. If something still hasn’t gotten better, that tells you exactly where to double down.
- Adjust your practice plan. Use what you heard to tweak your next practice. If the recording reveals that you keep dragging a bar, decide to slow that part down and practice it separately. If your posture looks slumped (if you videoed yourself), make a note to sit straighter. Treat each recording session like a mini-lesson: note the errors and then work on fixing them until you can record again with fewer mistakes.
- Keep a practice journal. Apart from recording , make a note of whatever you had worked on and what you discovered. For instance: “2025-06-20 – practiced blues riff. Recording shows I rush through the turnaround and my finger placement is sloppy. Need to slow tempo and focus on clear fretting.” Over time, your journal plus your recordings create a clear picture of your progress.
By making recording part of your routine, you’re essentially giving yourself constant feedback. Many students find that after a few sessions, they instinctively notice things while playing and you’ll develop an ear for it. But having the actual recording to reference is unbeatable for solidifying progress.
All Styles, All Instruments: Learning with Lens for Everyone
This approach works no matter what kind of music you’re into. If you’re a classical pianist, setting up your camera above the keys can show if your hand position matches what your teacher says. If you sing, video can reveal tension in your body or mouth posture you couldn’t feel in real time.
Drummers can place a phone to see both feet and hands, catching sloppy stick motions. Even in group or band lessons, recording the ensemble and then listening can highlight balance issues or timing problems among the players.
Singers and voice students often hate the sound of their own voice. At first it can sound weird because we are normally critical about the voice we hear from inside our head. But that is something you will get used to, with practice and refinement. In fact, hearing your true voice tone is a gift: it helps you develop a more natural and pleasant sound. And once you start hearing the difference, correcting pitch and expression becomes so much easier.
No matter your genre rock, jazz, pop, classical, world music the concept is the same. Technology lets you capture exactly what an audience (or your teacher) would hear. Then you get to be the musician and the critic. With time, this comprehensive feedback builds your confidence. You’ll enter performances knowing that you’ve already “heard” the concert versions of your pieces by reviewing your own recordings.
Tips for a Smooth Recording Session
To make the most of recording yourself, here are a few casual pointers:
- Keep it positive. The goal isn’t to beat yourself up over mistakes. Instead, say, “Okay, I see where I slipped – now I know to focus here.” Everyone sounds awkward on their first few recordings. That’s completely normal! Stick with it and you’ll start hearing improvement.
- Frame your shot. If you’re videoing, make sure the camera angle is helpful. For guitarists, show your fretting hand clearly. For singers, you might want your upper body and maybe a bit of your mouth for posture. Don’t worry if it’s not super professional, even a slight off-angle phone camera is fine. The point is to see what your posture and hands are doing. Sometimes video reveals a tense shoulder, a hunched back, or a jaw clench that you can then relax.
- Check audio levels. If you find your instrument or voice is too quiet on recording, bring the phone or mic a bit closer (but not too close that it distorts). On a computer, test the mic volume first. You can even do a quick trial: say “testing 1,2,3” and play back to ensure you’re audible.
- Be consistent. Try to record regularly maybe after every lesson or at least once a week. Regular snapshots of your playing will show steady progress. It’s like creating your own music diary.
- Review with someone. Sometimes it helps to listen together with your teacher or a peer. They can point out things you might miss. The Cliché Magazine notes you can also share your recorded lesson with others for evaluation. Don’t hesitate to ask a friend or family member for honest feedback. Sometimes a fresh ear catches new details.
Remember, technology is your practice buddy here. Even just placing your phone on a stack of books to film your hands can unlock insights that transform your learning.
Keep It Fun and Rewarding
Using recordings makes practice more like solving a fun puzzle. Instead of just playing over and over, you’re actively hunting for clues in your performance. And every time you hear an improvement (“Wow, I played that section much better than last month!”), it feels like a mini-wins triumph. It breaks the monotony of practice and gives you clear proof of your progress.
Plus, reviewing your old recordings is kind of nostalgic when you see the little musician you were a month or year ago. It’s incredibly motivating to see how far you’ve come, evaluating your progress. As one blog puts it, “You’ll be amazed at how much you’ve improved when you compare your old and new recordings”.
Finally, don’t feel pressured to share any recordings you’re not comfortable with. Keep them safe in your own files (consider a private folder or password-protect them). This is your personal growth tool, and you get to set the privacy. Over time, if you feel proud, you might even turn a good practice into a social media share or the first step of making your own music video.
Conclusion: Embrace the Camera (and Mic!)
“Learning with Lens” is about using the technology you already have to make music practice smarter and more satisfying. Recording yourself during online music lessons or practice sessions is free, easy, and it pays off big. It’s one of the simplest ways to track your progress and boost your improvement. By consistently recording, reviewing, and reflecting, you become your own coach – spotting errors, reinforcing strengths, and making each lesson count more than the last.
So next time you fire up your online music lesson, don’t forget the record button (or hit it on your phone afterward). Lean in as both student and audience. Your future self with better skills and awesome performances will thank you for listening. Keep that camera rolling, and let the lens help your music journey shine!


